Showing posts with label distress ink. Show all posts

Thursday, January 23, 2014

Wildflower Blog Share

Photo: Blog Share This Thursday January 23, 2014 starting at CliqueKits.com


Today I'm excited be a part of the Clique Kits Wildflower Blog Share hop.  It all started with Gia who sent us a pile of fun Carta Bella Wildflower papers along with a bag full of embellishment goodies.  A few days later Lacey sent us an envelope of custom designed die cuts and flair to go with the Wildflower papers we received.

Here is the quote the challenge is based on: "May your life be like a wild flower...Growing freely in the beauty and joy of each day"- Native American Proverb Challenge: Use something "wild" on your page. Literal interpreatation: a wild animal or plant.  Figurative interpretation: something unique/different for YOU!

You should have arrived here from Lacey's blog.  If you didn't, be sure and go back and check out her projects.

I received so much product I couldn't stop myself.  I'll start with a couple of layouts:


What's so wild about this layout?  The moose head and moose sticker I used to embellish this layout of some of my favorite summer blooms.  The literal interpretation.  I also hand-sewed a circle to further frame my layout.


I love the ombre color of this paper.  My wild element here is using the mesh ribbon from the kit as first, a stencil and then second, as an embellishment.  I used the Perfect Pearls powder with Watermark ink for the stenciling.  To the kit I added crimped, gray cardstock, burlap, and a gray flower with some machine-sewing to complete this page.


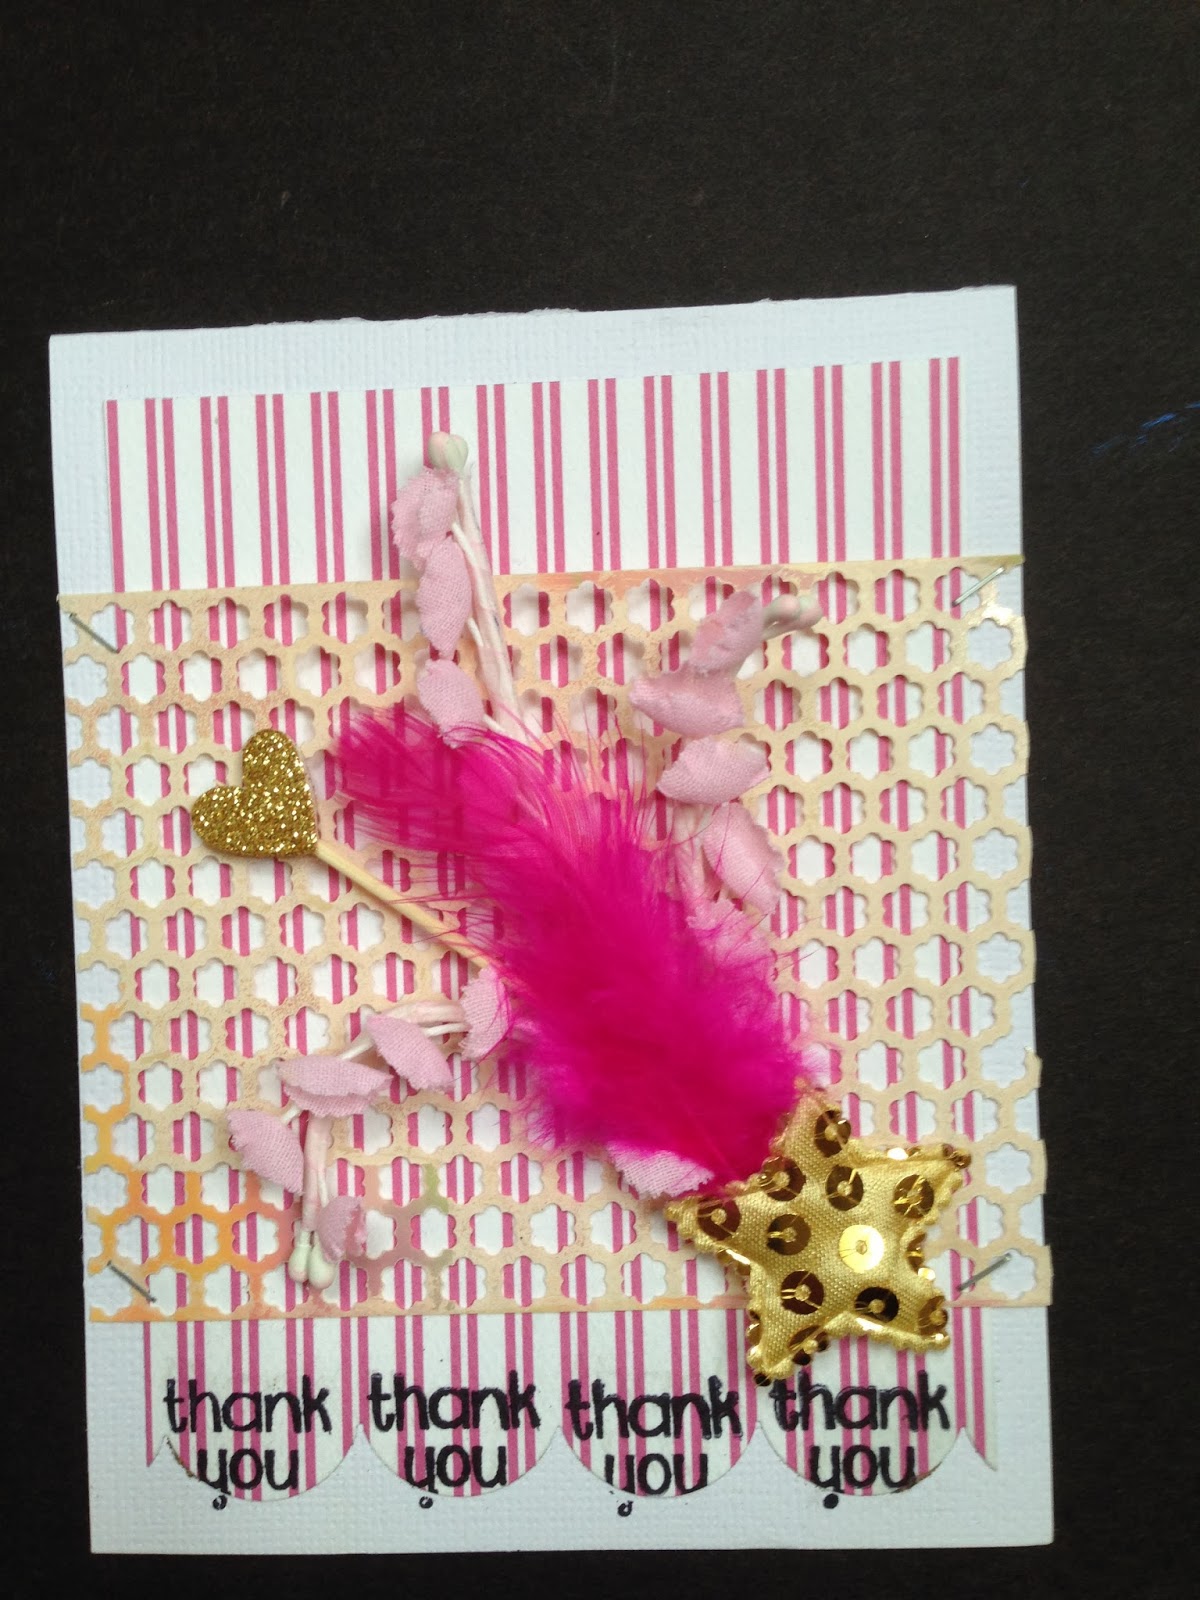
I made a couple of cards as well.  I used bits and pieces of papers, embellishments, flair and even feathers to make these two cards.  Feathers and the little fox are the wild elements on these.


 I also made a couple of ATCs as well.  I used the mesh ribbon with some texture paste to make the plain cardstock more interesting.  I made a color mist with the Perfect Pearls mixed into some water in a spritzer bottle.  I used some of the layered flowers I made for the project below to finish these off.


 And finally what I'm calling a chunky tag.  Fun, huh?


Here's how it started.  I took a piece of wood, three inches wide, six inches long and not quite an inch thick.


I made paint mixing the Perfect Pearls powder with some water.  I painted it on with a brush, allowing it to dry between coats.


I die cut a bunch of flowers with my Tim Holtz tattered florals mini die.


I layered up the flowers after inking and added Glitz rhinestones to the centers.


The little "art doll" is my wild element.  I've never made one of these before.  I picked up the die a few weeks ago in the clearance bin at ACMoore.  

 
I layered on the mesh ribbon, the photo frame die, leaf die, flowers, and a butterfly from my stash.  The flower angel wings are Tim Holtz grunge board covered with Distress Crackle paint and dabber.


 I added a button on top and bottle cap feet.  This garden angel chunky tag makes me think of spring.  Anything that makes me think of spring when we just got a foot of snow and have temps in the single digits is very good.  :)

So, if you're still with me here, thanks for checking out my projects!  Next up, Cathie's blog.  Be sure to leave me a comment and follow me for more chances to win this fabulous prize.
Picture
Gone Typo Theme Set (Collection by Hazel & Ruby) with coordinating embellishments and mini album.
 Every blog you leave a comment on enters you to win the prize. Share on Facebook for an extra entry. 

 Be happy, get scrappy!

Jenn

Thursday, November 21, 2013

Heidi Swapp Mixed Company Blog Share

Heidi Swapp Mixed Company Blog Share
"The world is round so that friendship may encircle it"


Confession time.  I don't always read all the instructions.  When I do they go in one brain cell and out the other.  If I don't write it down I'm not responsible to remember.  I just had a birthday so I'm getting old.  All of these combined created my current conundrum.  

I was so excited to be included in this blog share.  I briefly read the instructions.  I got my box of goodies and it sat on my scrap table for days until I had time to open it up.  I was floored by all the product and goodies inside.  It was like Christmas.  Or my birthday.  ;) 

I immediately thought I'd use the paper with the circles as individual elements, and that the friendship quote would be perfect for the photos I took at retreat.  But I didn't write it down.                                                                                               

When I pulled out the pack of goodies during my crop circle time I got caught up in the folder and thought it would make a great mini-album, perfect for the photos from my husband's aunt's recent visit.  Imagine an 85 year old Norwegian woman traveling to the US to visit her 83 year old brother (my father-in-law).  She speaks very little English yet she traveled on her own to spend some time with him this past summer.  I want to be just like her when I grow up.  Adventurous.  I will blog that mini album one day.  

Meanwhile I finally got around to really reading the challenge and instructions for this blog share.  Simple enough:  Use something round!  Hmmm...nothing really round in that mini-album.  Now what?  I know!  I have some great photos from the retreat this summer and those circles would make great embellishments.  So without further ado:


I wish retreat could have lasted forever.  Well, for another week anyway.  Meeting some of the design team members I've worked with online was an experience I'll always remember.  They're even more fabulous in person.  I remember Gia saying my name and I barely recognized her!  Seeing Sheri in the hall and totally recognizing her.  Meeting Janey and Rosann and Meg, as well as many of the consultants whose names I only recognized from the studio.  I now count these women in my circle of friends and what better quote, papers and pix to go together.

 
In addition to the Heidi Swapp Mixed Company product--which includes the fun chevron background paper, the mistable Remember background paper, the mistable banner tag and the aforementioned "Good Times" sheet of circles I used a piece of Bazzil Shimmer cardstock, Heidi Swapp Color Shine mists in Mint Green and Gold, Peacock Feathers Distress Ink, a Le Pen in teal and pieces from the blue blog candy bag that was in the box.  

I guess the circle motif comes out pretty well, huh?  lol  I went all out circles.  I even included the quote on the rim of my large blue circle.

So here's what you need to do.  Leave me a comment.  Make it a nice one.  ;)  Check out Jody Spiegelhoff,  Erica Thompson, and Gia Lau's blogs.  They've all created amazing projects with the Heidi Swapp Mixed Company product.  Leave them nice comments too.  Follow our blogs if you don't already.  Share the posts on Facebook.  Tweet them.  For every comment and follow and share you'll be entered into a drawing.  Gia has put together a really nice Holiday Tag kit for one lucky winner.  Looks something like this.
                                                   
                                                     Picture

Jody has some blog candy she's going to send out as well.  I hear it's sequins.  Who doesn't love sequins? 
So, in the words of my dearest, darling daughter, shake a tail-feather and check out the rest of the blogs.

Be happy, get scrappy,

Jenn


Monday, October 14, 2013

It's Blog Hop Day!!!


It's finally here, Blog Hop day!!!  I've been looking forward to this for a month or so now.  I'm loving all the new products in the Fall/Winter catalog, which you can see here.

First, THANK YOU for patiently hopping along.  You've made to to the end! 

Today, I'm featuring products from Fancy Pants Capturing Moments.  I love the colors and images in this theme set.  I started with a basic two-page layout.  I don't worry much about scrapping chronologically and pull out pix that look good with the colors in them.

 As you can see, this is all about dying Easter Eggs.  I loved the colors of the papers with the colors of my granddaughters eggs. 

I used the 6x6" paper pad to for the die cut flowers and scalloped oval.  Otherwise, I let the paper speak to me.

I made good use of the ephemera pack, tags and ticket roll as well.  

When I got together with my crop circle, my friend Kim brought along some vintage Halloween images and ideas for the Halloween Crafternoon for which she was preparing.  I borrowed some of the images and supplies she brought, paired them with my Capturing Moments scraps and came up with this fun rosette.
I made the rosette with 2-2 1/2x12 inch paper strips that I edge-punched, and my Martha Stewart Score Board.  I fussy cut the pumpkin image and pulled out some of the pieces in the ephemera pack and layered them up.  Inked the edges too.  Isn't he cute?
This Boo tag started with a tag made from the 6x6" paper pad and layered with another piece from that pad.  I used a Studio Calico stencil and black soot distress ink for the next layer.  Another fussy cut vintage image and collar from a cupcake liner provided by Kim and ephemera and ticket from the collection.  

Looking over these three projects I realized I could have used holiday themed papers to create them, but rather than limit my creativity to papers only used for specific holidays I can use any papers I fall in love with and use them for any memory--holiday or otherwise.  

Again, thanks for hopping along.  I know you've seen some amazing projects from the TeamWorks girls.  Each is so talented and has a unique style.  I am honored to be a part of the team. 
Don't forget to leave your comment here on my blog for a chance to win a prize from Memory Works.  The more comments you leave, the more chances you have to win!  Can't beat that, huh?  You have until midnight CST to leave comments.

For a complete list of blogs participating in today's hop, see the Memory Works blog.

Thanks for stopping by!!!

Be happy, Get scrappy!!

Jenn